How to Create a Telegram Bot with Swift Using Vapor on Ubuntu / macOS
- Updates
- Prerequisites
- Step 0: Connect to Your Server
- Step 1: Install Swift
- Step 2: Prepare Your Environment
- Step 2.1: Install Vapor Toolbox
- Step 2.2: Clone SwiftyBot
- Step 3: Meet Vapor
- Step 3.1: Config Folder
- Step 3.2: Sources Folder
- Step 3.3: Package.swift File
- Step 4: Enable TLS
- Step 4.1: Install Let's Encrypt (aka Certbot)
- Step 4.2: Use Apache / Nginx as Reverse Proxy
- Step 5: Create a Telegram Bot
- Step 5.1: BotFather - One Bot to Rule Them All
- Step 5.2: Set a Webhook
- Step 5.3: Set Your Bot (Optional)
- Step 6: One More Thing - Supervisor
- Bonus: Remote Debugging
- What's Next?
- Part 2: A Messenger Bot
#Updates
- 11 November 2016: Updated for Swift 3.0.1
- 22 December 2016: Updated for Swift 3.0.2
- 07 February 2017: Added link for part 2, a Facebook Messenger bot
All bot’s source code is available here on GitHub!

Since I started learning Swift, I fell in love.
I’m constantly improving myself with it and I have used BFKit-Swift to learn it more in deep.
Last month I found Vapor on GitHub, it is well documented and, currently, is the most used web framework for Swift.
I was curious about it, so I tried it!
Meanwhile Vapor 1.1 and Swift 3.0 was released, I continued updating my bot to compile with the latest versions.
In this tutorial we will create a Telegram bot, a simple one, that just respond us with a reversed message with Swift.
The result will be a bot like SwiftyBot, you can try it here.
We will start from scratch to get a complete working bot.
Let’s begin!
#Prerequisites
My VPS was based on OVH with Ubuntu 14.04 and Plesk to manage the environment and my websites.
- Ubuntu (mine is 14.04) or a macOS computer with Xcode 8.2
- Facebook account with a Page
#Step 0: Connect to Your Server
If you are using a remote server, we need to connect to it remotely:
ssh [email protected]
Note
You have to change “user” and “0.0.0.0” with your username (maybe root) and the IP of your server.
#Step 1: Install Swift
If you are on macOS you only need Xcode 8.2.
Otherwise if you are on Ubuntu, we have to install Swift, and we will use swiftenv to do it.
Swift Version Manager (swiftenv) allows you to easily install and switch between multiple versions of Swift.
You can change the global Swift version and set a per-project Swift version.
It uses a .swift-version file in your project folder to identify what Swift version your project needs.
Clone the Git repo:
git clone https://github.com/kylef/swiftenv.git ~/.swiftenv
Tip
You can install it wherever you want. For example on my VPS I’ve created a “fabrizio” folder where I put all the Swift versions and projects. Change “~” with your favorite folder.
Configure the environment variables and set the autostart:
echo 'export SWIFTENV_ROOT="$HOME/.swiftenv"' >> ~/.bash_profile
echo 'export PATH="$SWIFTENV_ROOT/bin:$PATH"' >> ~/.bash_profile
echo 'eval "$(swiftenv init -)"' >> ~/.bash_profile
Note
Remember to change “$HOME” with your custom folder if you have changed it before.
Maybe after that you will need to disconnect and connect again to your server or even reboot it.
After that we have to install the right version of Swift using swiftenv:
swiftenv install 3.0.2
You can choose to set a global or a per-project version of Swift.
I choose both.
I created a .swift-version file, with the snapshot / preview version of Swift, inside every project folder, and set a global version with:
swiftenv global 3.0.2
The last thing is to check that everything we have made is working:
swift --version
This will print Swift version 3.0.2 if you are on Ubuntu or Apple Swift version 3.0.2 if you are on macOS.
Please note that if you are on Ubuntu 14.04 you may need to update clang.
sudo apt-get install clang-3.6
sudo update-alternatives --install /usr/bin/clang clang /usr/bin/clang-3.6 100
sudo update-alternatives --install /usr/bin/clang++ clang++ /usr/bin/clang++-3.6 100
If you are on macOS you may need to install ctls with brew:
brew update;
brew tap vapor/homebrew-tap;
brew install ctls;
#Step 2: Prepare Your Environment
To build our bot we will use Vapor.
Note
Vapor is a Web Framework for Swift that works on macOS and Ubuntu.
Is the most used web framework for Swift. It provides a beautifully expressive and easy to use foundation for your next website or API.
You can now choose:
- Step 2.1 You can use Vim, and edit your source files directly on your server.
- Step 2.2 You can clone my own SwiftyBot repository and get it ready immediately.
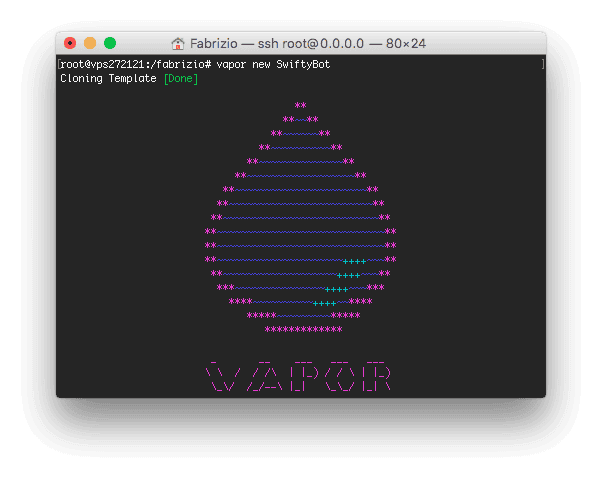
#Step 2.1: Install Vapor Toolbox
We have to install the Vapor Toolbox to help us create our project. To install it:
curl -sL toolbox.qutheory.io | bash
Go into your favorite folder and create our project by typing:
vapor new
Note
Replace <yourBotName> with your bot name. Yes, you have to choose a name for your bot now.
Vapor Toolbox has created for us a folder with your chosen name, and has cloned the Vapor basic template repository into your folder.
Last thing, just rename the App folder under Sources folder to your bot name.
You can now jump to Step 3.
#Step 2.2: Clone SwiftyBot
We have to clone the SwiftyBot repository.
If you want to use GitHub, just fork it with this button!
Otherwise go into you favorite folder and type:
git clone https://github.com/FabrizioBrancati/SwiftyBot
#Step 3: Meet Vapor
After Step 2.1 or Step 2.2 your bot folder should look like this:
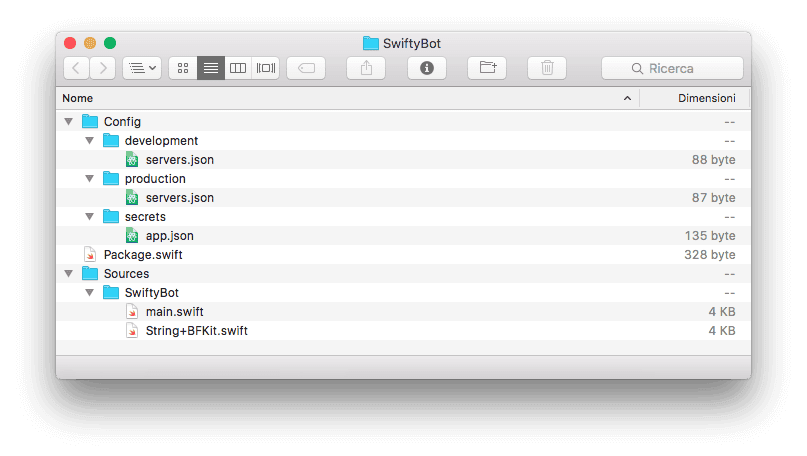
You can delete Localization, Public and Resources and other files that are not on the image above, because out bot will not use them.
#Step 3.1: Config Folder
Is this folder you can set your application’s configuration settings and custom keys.
More at Vapor - Config Documentation.
Inside Config folder there is a secrets folder.
There you have to create an app.json file, with following code:
vi app.json
Tip
To save and exit from vi you can press the esc button and then type :wq.
Now inside this file type:
{
  "secret": "XXXXXXXXXXXXXX"
}
Note
Change “XXXXXXXXXXXXXX” with a secret key or your Telegram bot token from Step 5.1.
Inside server.json files (from both development and production folder) we have the server configuration, like host, port and security.
{
  "production": {
    "port": 1992,
    "host": "0.0.0.0",
    "securityLayer": "none"
  }
}
Change line 2 with development in server.json file inside development folder
#Step 3.2: Sources Folder
This is the bot’s source code folder.
Here we have all the bot code, and it all starts with the main.swift file.
Every line of this code is commented, so I will not go in deep about it.
If you are on macOS to edit the bot’s source code, you can use Atom or Xcode with the following Terminal line:
swift package generate-xcodeproj
Or with Vapor Toolbox if you have installed it at Step 2.1:
vapor xcode
This is the source code form the main.swift file:
/// Import Vapor framework.
import Vapor

/// Bot errors enum.
enum BotError: Swift.Error {
    /// Missing secret key in Config/secrets/app.json.
    case missingSecretKey
}

/// Create the Droplet.
let drop: Droplet = Droplet()

/// Read the secret key from Config/secrets/app.json.
guard let secret = drop.config["app", "secret"]?.string else {
    /// Show errors in console.
    drop.console.error("Missing secret key!")
    drop.console.warning("Add one in Config/secrets/app.json")

    /// Throw missing secret key error.
    throw BotError.missingSecretKey
}

/// Setting up the POST request with the secret key.
/// With a secret path to be sure that nobody else knows that URL.
/// https://core.telegram.org/bots/api#setwebhook
drop.post(secret) { request in
    /// Let's prepare the response message text.
    var response: String = ""

    /// Chat ID from request JSON.
    let chatID: Int = request.data["message", "chat", "id"]?.int ?? 0
    /// Message text from request JSON.
    let message: String = request.data["message", "text"]?.string ?? ""
    /// User first name from request JSON.
    var userFirstName: String = request.data["message", "from", "first_name"]?.string ?? ""

    /// Check if the message is empty
    if message.characters.isEmpty {
        /// Set the response message text.
        response = "I'm sorry but your message is empty 😢"
    /// The message is not empty
    } else {
        /// Check if the message is a Telegram command.
        if message.hasPrefix("/") {
            /// Check what type of command is.
            switch message {
            /// Start command "/start".
            case "/start":
                /// Set the response message text.
                response = "Welcome to SwiftyBot " + userFirstName + "!" +
                           "To list all available commands type /help"
            /// Help command "/help".
            case "/help":
                /// Set the response message text.
                response = "Welcome to SwiftyBot " +
                           "an example on how create a Telegram bot with Swift using Vapor." +
                           "https://www.fabriziobrancati.com/blog/how-create-telegram-bot-swift-vapor-ubuntu-macos" +
                           "/start - Welcome message" +
                           "/help - Help message" +
                           "Any text - Returns the reversed message"
            /// Command not valid.
            default:
                /// Set the response message text and suggest to type "/help".
                response = "Unrecognized command." +
                           "To list all available commands type /help"
            }
        /// It isn't a Telegram command, so creates a reversed message text.
        } else {
            /// Set the response message text.
            response = message.reversed(preserveFormat: true)
        }
    }

    /// Create the JSON response.
    /// https://core.telegram.org/bots/api#sendmessage
    return try JSON(node:
        [
            "method": "sendMessage",
            "chat_id": chatID,
            "text": response
        ]
    )
}

/// Run the Droplet.
drop.run()
Note
At line 70 you will use the BFKit-Swift String extension that you will add in the next file.
Next file is String+BFKit.swift.
Here there is the reversed String algorithm:
// All the following code has been extracted from BFKit-Swift.
// https://github.com/FabrizioBrancati/BFKit-Swift
// Check the swift3.0 branch at /Sources/Extensions/Foundation/String+BFKit.swift file.

/// Import Swift Foundation framework.
import Foundation

/// This extension adds some useful functions to String.
extension String {
    // MARK: - Instance functions -

    /// Returns string with the first character uppercased.
    ///
    /// - returns: Returns string with the first character uppercased.
    public func uppercaseFirst() -> String {
        return String(self.characters.prefix(1)).uppercased() + String(self.characters.dropFirst())
    }

    /// Returns the reversed String.
    ///
    /// - parameter preserveFormat: If set to true preserve the String format.
    ///                             The default value is false.
    ///                             **Example:**
    ///                                 "Let's try this function?" ->
    ///                                 "?noitcnuf siht yrt S'tel"
    ///
    /// - returns: Returns the reversed String.
    public func reversed(preserveFormat: Bool = false) -> String {
        guard !self.characters.isEmpty else {
            return ""
        }

        var reversed = String(self.removeExtraSpaces().characters.reversed())

        if !preserveFormat {
            return reversed
        }

        let words = reversed.components(separatedBy: " ").filter { $0 != "" }

        reversed.removeAll()
        for word in words {
            if word.hasUppercaseCharacter() {
                reversed += word.lowercased().uppercaseFirst() + " "
            } else {
                reversed += word.lowercased() + " "
            }
        }

        return reversed
    }

    /// Returns true if the String has at least one uppercase character, otherwise false.
    ///
    /// - returns: Returns true if the String has at least one uppercase character, otherwise false.
    public func hasUppercaseCharacter() -> Bool {
        if CharacterSet.uppercaseLetters.contains(self.unicodeScalars.last!) {
            return true
        }
        return false
    }

    /// Remove double or more duplicated spaces.
    ///
    /// - returns: Remove double or more duplicated spaces.
    public func removeExtraSpaces() -> String {
        let squashed = self.replacingOccurrences(of: "[ ]*", with: " ")
        return squashed ///.trimmingCharacters(in: CharacterSet.whitespacesAndNewlines)
        /// There is a Linux only bug here.
        /// The bot crashes every time an emoji is sent.
        /// Telegram trims every input, so we can skip trimming.
    }
}
If you have Models, Middleware and Controllers folders, delete all, because we don’t need them in this tutorial.
#Step 3.3: Package.swift File
Note
The Swift Package Manager is a tool for managing the distribution of Swift code.
It’s integrated with the Swift build system to automate the process of downloading, compiling, and linking dependencies.
Here we define our package name and all the bot’s dependencies.
import PackageDescription

let package = Package(
    name: "SwiftyBot",
    dependencies: [
        .Package(url: "https://github.com/vapor/vapor.git", majorVersion: 1, minor: 0)
    ],
    exclude: [
        "Config",
        "Database",
        "Localization",
        "Public",
        "Resources",
        "Tests",
    ]
)
At line 4 we have the dependencies array where we will put all bot’s dependency.
A target’s dependencies are modules that are required by code in the package.
As you can notice, currently we have only Vapor 1.1.X.
This is all bot’s source code.
May be not the latest version of bot’s code, because SwiftyBot code continuously evolves.
You can check 1.0.0 tag version for code used in this tutorial.
#Step 4: Enable TLS
Please notice that if you are on macOS you have to enable TLS/HTTPS by yourself, a self signed certificate should be valid.
You can check it here.
To receive messages from Telegram we need to enable HTTPS for your domain.
Telegram uses 443, 80, 88 or 8443 port for Webhooks.
More info here.
In this step, we will use Let’s Encrypt to enable TLS on our server with Apache and nginx as a reverse proxy, only using with Plesk.
I will show you how to use Plesk since my VPS has it by default, but you can do everything without it.
![]()
Note
Let’s Encrypt is a free, automated, and open certificate authority (CA), run for the public’s benefit. It is a service provided by the Internet Security Research Group (ISRG).
They give people the digital certificates they need in order to enable HTTPS (SSL/TLS) for websites, for free, in the most user-friendly way they can.
They do this because they want to create a more secure and privacy-respecting Web.
You can find more at Let’s Encrypt’s website.
#Step 4.1: Install Let’s Encrypt (aka Certbot)
To install Let’s Encrypt extension you need to open your Plesk panel and go to Extensions > Extensions Catalog.
Search for Let’s Encrypt (current version is 1.9) and install it.
Return to Plesk home Websites & Domains and you will now have a Let’s Encrypt section under your domain.
Click on it and request a certificate with your email.
#Step 4.2: Use Apache / Nginx as Reverse Proxy
To enable reverse proxy to our bot, go to Apache & nginx Settings section of your domain.
In the Additional Apache Directives > Additional directives for HTTPS add this code:
ProxyPass         /  http://localhost:1992/
ProxyPassReverse  /  http://localhost:1992/
ProxyRequests     Off
ProxyPreserveHost On
<Proxy http://localhost:1992/*>
    Order deny,allow
    Allow from all
</Proxy>
Plesk uses Apache with nginx as a reverse proxy, so this directive will work over nginx.
More info here.
#Step 5: Create a Telegram Bot
In this step you will create a Telegram bot.
To create it you need a Telegram account and a Telegram App, no matter for what platform.
#Step 5.1: BotFather - One Bot to Rule Them All
To create a Telegram bot, we need to write to another bot!
It is BotFather, a bot to rule them all.
Start talk to him by clicking the Start button on the bottom.
Now with the /newbot command we will create a new bot.
You need to choose a name and an username, the last one must ends with bot. I chose SwiftyBot. Now the bot will return us an access token needed for the Telegram’s HTTP API.
Telegram has two mutually exclusive ways of receiving updates for our bot.
It this tutorial you will use the Webhooks method.
#Step 5.2: Set a Webhook
Do you remember the secret key at Step 3.1?
We will use it to set the Webhook URL.
Note
Webhooks are “user-defined HTTP callbacks”.
They are usually triggered by some event, such as pushing code to a repository or a comment being posted to a blog.
When that event occurs, the source site makes an HTTP request to the URI configured for the webhook.
Users can configure them to cause events on one site to invoke behaviour on another. The action taken may be anything.
For this step you can use Terminal or any other HTTP POST App, like Postman.
To set the Webhook URL we need to send an HTTP POST request to Telegram with the access token from the BotFather.
To do this we will use curl:
curl --request POST 'https://api.telegram.org/bot/setWebhook' --data "url=https:///"
If all is ok you should get this response:
{
  "ok": true,
  "result": true,
  "description": "Webhook was set"
}
You have now set your bot with all the required things, hurray! 🎉
#Step 5.3: Set Your Bot (Optional)
You can now set some things of your bot like:
- Change the bot description
- Change about text (Inside bot infos)
- Change bot profile photo
- Change bot commands list
To do this things just send to BotFather the right commands.
#Step 6: One More Thing - Supervisor
At this point we have almost finish with the bot.
But there is one more thing.
What if your server shut down or your bot crashes?
Obviously your bot will stop respond to your messages, and you will need to access to your server to make it restart.
Wouldn’t be awesome if someone can do this things for you?
We are now pleased to announce… Supervisor!
Ok, now return serious.
Supervisor is a client / server system that allows its users to monitor and control a number of processes on UNIX-like operating systems.
In other words, will ensure that your process (the bot in this case) is always running, even if the server reboot or the process crashes.
Now we have to install Supervisor.
On Ubuntu:
apt-get install supervisor
On macOS:
brew install distribute
sudo easy_install pip
sudo pip install supervisor
Important
If you have not brew installed, check it here.
Now we have to set Supervisor for our bot.
We have to create the configuration file where we will set how to start, and restart, our bot.
On Ubuntu create a file at /etc/supervisor/conf.d/YOUR-BOT-NAME.conf with vi:
vi .conf
This will create the configuration file on your server.
Now in this file type:
[program:]
command=///.build/release/ serve --env=production
directory=//
user=www-data
autostart=true
autorestart=true
Tip
To save and exit from vi you can press the esc button and then type :wq.
The Supervisor folder may be different, you can find the includes path at /etc/supervisor/supervisor.conf.
Now we have to inform Supervisor about our bot.
To enter the Supervisor UI type:
supervisorctl
Then type the following commands:
reread
add
start
Note
Same name of your .conf file and program name inside .conf file
If you need to restart your bot type:
restart
#Bonus: Remote Debugging
Sometimes you may need to debug your bot, but you don’t have your computer and you can connect only remotely to your server.
LLDB can help for us:
lldb
run
Please note that if you are using Swift 3.0.2 or later you may need to create a target before run command.
target create
Now you can run your bot and when it crashes you can get the backtrace just with:
bt
Now you will be able to see which line of code causes your crash!
At last, sometimes your bot process may be persistent and it doesn’t want to kill himself.
So you may need a task manager, I recommend htop.
You can install it on Ubuntu with:
apt-get install htop
#What’s Next?
That’s all folks!
You have now a complete working bot made with Swift!
Now you can expand it some other features or completely change it with whatever you want.
If you want you can try talking with SwiftyBot just by searching for it on Telegram or click here!
I will update my SwiftyBot with some other features, just remember to check future updates on GitHub repository!
#Part 2: A Messenger Bot
You can now check the part 2 of this tutorial, a Facebook Messenger bot with Swift!
Websites you should check:
Swift website
Swift Version Manager repository
Swift Package Manifest File Format Reference
Vapor repository
Let’s Encrypt website
Telegram bot API
Supervisor documentation